To get started, click here and start using Zoom today so you can better follow this step by step.
What is Zoom?
Zoom is a meeting tool where you can do many things with it, including:
Have up to 100 people in your meetings using the free version (more on the free version later); Share your screen; Have a chat – chat style – during meetings; Record your meeting and then send it to anyone who couldn’t attend; Draw on the screen of the screen sharer (extremely useful); Use a whiteboard to draw while in a meeting. Extremely useful when you want to explain an idea; Enable or disable other participants’ sound and camera.
There are also other things I really like about Zoom:
The free version of Zoom has many features and solves most problems; It has great stability, failing a few times; The image quality is great (notice they even have a filter that makes us more beautiful. It’s true!).
Note: The tutorial I’m going to write next was done on Windows. If you use Mac, it is normal that the screens are a little different, but nothing that prevents you from being able to perform all the steps. Also, read: 8 best apps to download free music
How to start using Zoom?
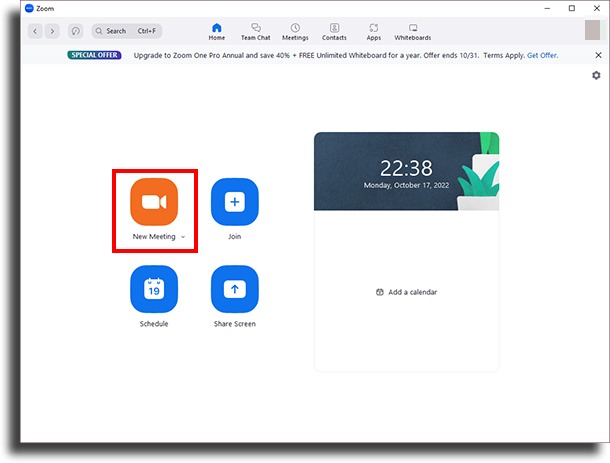
To use Zoom, you need to download the app. Unlike other meeting apps like Proficonf, Zoom requires you to have an app. After creating your account and downloading the application, just click on New Meeting as shown in the image below:
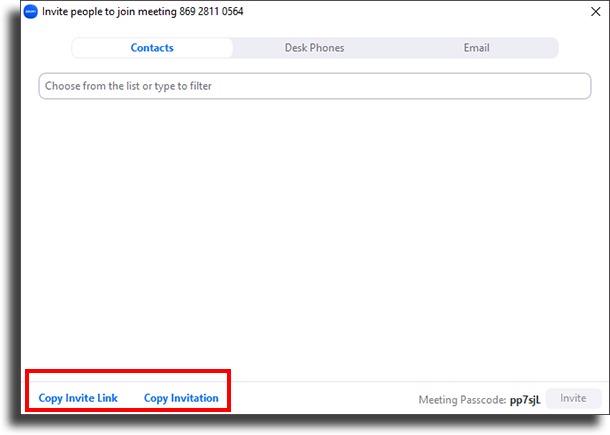
When you click there, a screen will open and you can invite people by clicking “Participants” and then “Invite“:
Then click on “Copy Invite Link“:
Now, just send the link to the person who will meet you. Remembering that they need to have the Zoom app downloaded to be able to enter. If they haven’t downloaded it yet, Zoom will ask them to download it. Article Tip: Apps for perfect photos: the 10 best options
Sharing the Zoom screen
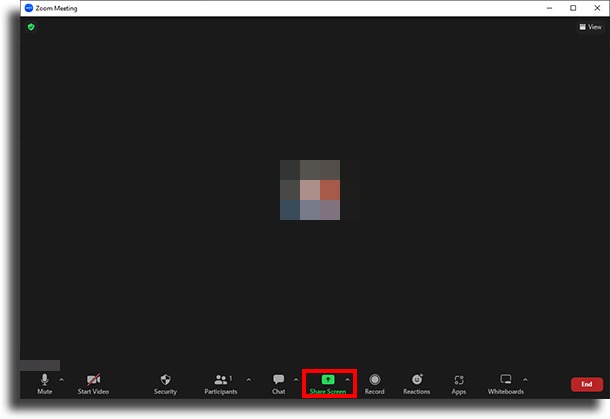
One of the main features of Zoom for those who teach is to share the screen. To do this, you need to click on the Share Screen button, here:
And here it shows several options, let’s see:
What does all this mean? I’m gonna explain the:
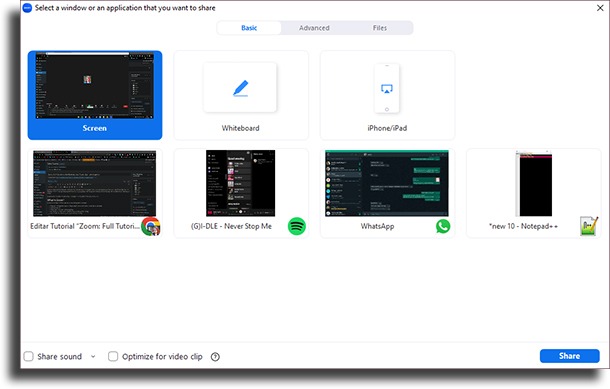
Desktop 1 and Desktop 2: As I have two screens, it shows me 2 Desktops. But if you only have one screen, only Desktop 1 will appear. If you select this option, everything on your computer will appear when you share the screen. Whiteboard: If you select this option, you will share a whiteboard on which you can draw or write. Very cool to explain ideas iPhone/iPad Via Airplay: You share your cell phone’s screen via AirPlay (in the case of iPhones) iPhone/iPad via cable: You can share the cell phone via a cable
The remaining screens are applications that are open. That is, you can share the screen completely – through Desktop 1 – or by selecting a specific application.
Setting the sound in Zoom
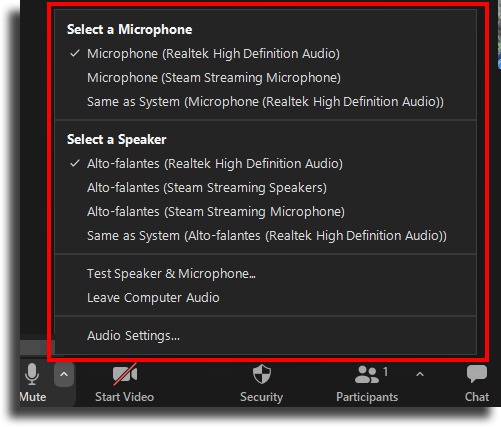
Another important thing in your Zoom meetings is to have good sound, after all, people need to clearly understand what you are talking about. In Zoom, you can use the computer’s own microphone or connect an external one. See in the image:
In my case, I have a very default Realtek High Definition Audio turned on, and an external microphone. The same is applied to the speaker, the place where the sound will come out. In my case, I am using Airpods.
Zoom video and background
As for the video, you can turn it off, change the camera or even use a background. Let’s talk a little about it:
Turn the video on and off. Just click on the Zoom video symbol to turn it off. Select a Virtual Background. I discovered this while recording this tutorial: You can select a virtual background by changing your background. Nice to create a relaxed atmosphere with the team :) Video settings. Here you can change various things such as leaving the video in HD or not, putting a filter to make you look better, or changing the camera.
Record the Zoom meeting
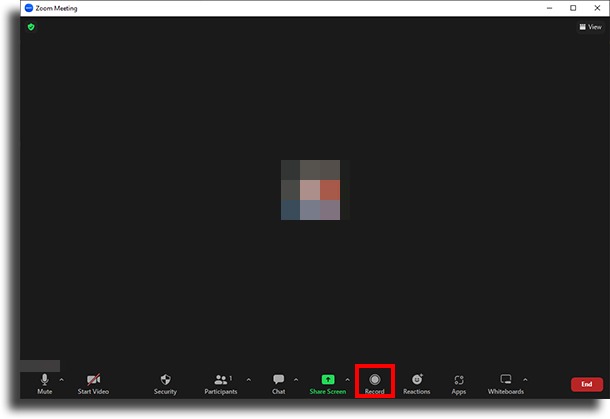
One of the most interesting options of Zoom is the possibility to record the meeting or class. In this way, you can make it available to all students. To record, just click this button here:
I recommend that you always save the class in the cloud, as I’ve had some problems recording on the computer. And where is the recording in the cloud? It lives directly in your Zoom account and you get an email when Zoom finishes uploading your class. Normally, 2 hours after finishing the class, I usually have it available for download on Zoom. Note: The longer the class, the longer it will take for Zoom to have it available. Note 2: To view the replay, you can download the class or watch it through a link provided by zoom. This link arrives by email. On the free plan, there’s no way to record in the cloud and it’s only available from the lowest-paid plan.
Scheduling Zoom Meetings
Another very cool feature is the ability to schedule meetings. Imagine you have a meeting every Monday at 9 am. Do you need to create a meeting every Monday? Of course not. You can schedule a recurring meeting. This way the link will always be the same. Participants just enter it at the agreed time. But how do you do it? Simple: Before starting a meeting, click on the Schedule option:
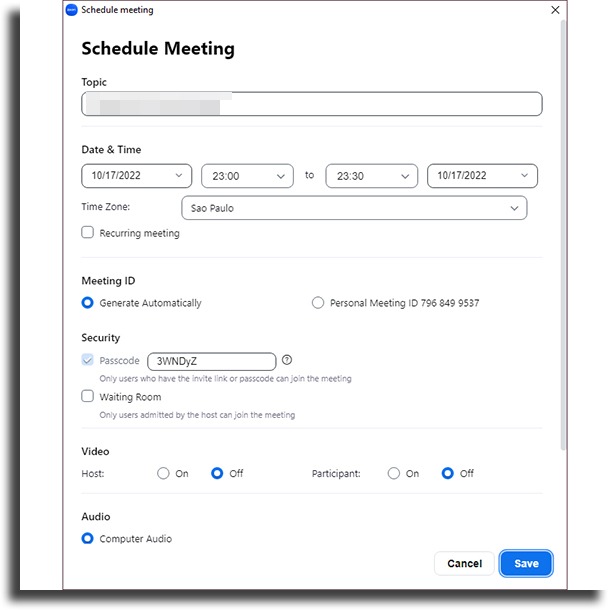
After clicking the button, it asks you to tweak some settings. Let’s talk about them:
Topic: Here you write the title of the meeting. It is for internal identification. Date: Here you set the date of the meeting if it happens once OR you select a recurring meeting. This recurring meeting is for the example we set. If you want to repeat a meeting and want the link to always be the same, you need to have this option selected. Password: Never leave the password prompt active. Otherwise, whoever receives the link will be forced to put in that password and that only complicates it. Always leave the password option disabled. Calendar: If you want, you can integrate your Zoom account with your iCal or Google Calendar, so that every scheduled meeting is directly on your calendar.
Accessing the other person’s computer via Zoom
One option I use a lot during classes is the option to access the student’s computer. With their permission, I can control the student’s computer remotely. For me to be able to do this, the student needs to share the screen and then an option will appear that allows me to control the student’s screen. Also, read: 15 apps to use when creating your business logo!
And does Zoom on mobile and iPad work well?
I only use Zoom on mobile as a last resort. It works fine, yes, but you have pretty big limitations. You cannot record the class on the computer or have access to your student’s screen. On the iPad, I don’t recommend using Zoom. The sound usually gives a lot of problems and the possibility of sharing the screen is still not well adapted for the iPad. If it’s a conversation-only meeting and you don’t need to share the screen or draw on it, then Zoom is fine.
Other Zoom questions
Below, I answer a few more common questions about Zoom:
How many meetings can I have on the free plan?
You can have as many meetings as you want, remembering that they end after 40 minutes. But then you just create another meeting, send the link to the participants and continue. On the first paid plan, your meeting can be up to 24 hours long.
How many participants can I have?
On the free plan and the lowest plan, you can have up to 100 participants at the same time. In the remaining plans, you can go up to a thousand people.
Can I record my Zoom class even on the free plan?
You can but only on the computer. The option to record to the cloud is only on the paid plan.
Ready to use Zoom for meetings?
Did you like this tutorial? I hope it helped you and any questions I’ll be here to help you. Just leave a comment! :)