Creating stickers on Telegram
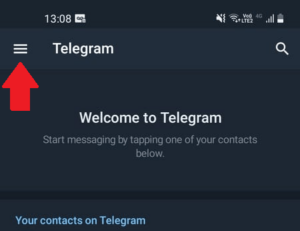
While you need external apps to create stickers for other apps like WhatsApp, Telegram has a simpler method. It uses bots that do pretty much all the work for you. To get started, open Telegram and click on the three vertical bars on the left side.
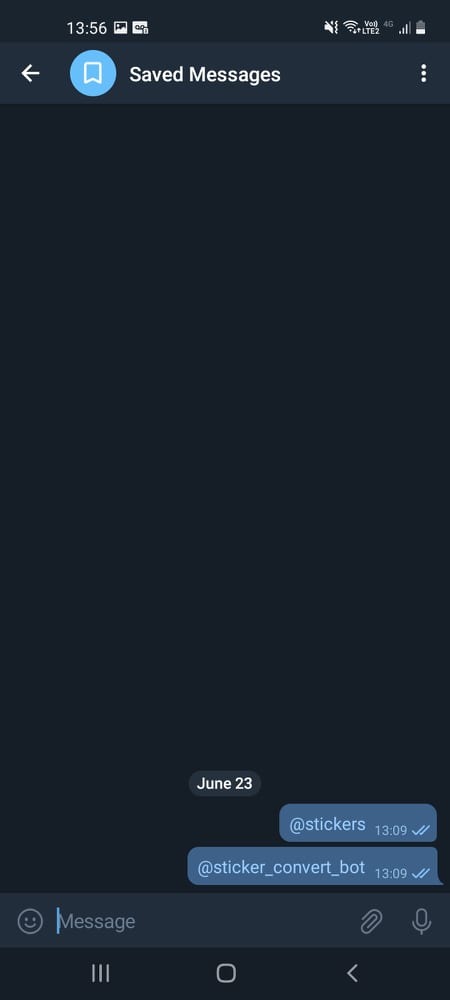
This will show you some basic options for your profile in the app. Click the “Saved Messages” option.
This will open a special chat that only you can see. It is in this chat that you can send links or messages with something to remember later, for example. This chat is also useful for starting chats with Telegram bots, which is what we’re going to do now. To create Telegram stickers we will rely on the help of the bots @stickers (which creates the packages of stickers) and @sticker_convert_bot (which resizes your images to the size requested by Telegram for the stickers).
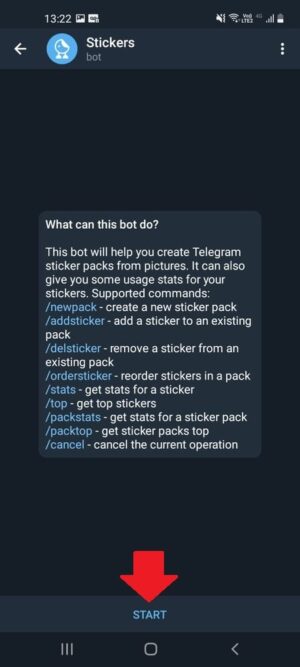
You just need to write these two names and send them as a “saved messages” chat message. When you do this, they will appear as links in the chat, just click on each of them to start the chat. The first one we are going to use is @stickers. Open the conversation with him and click “Start”.
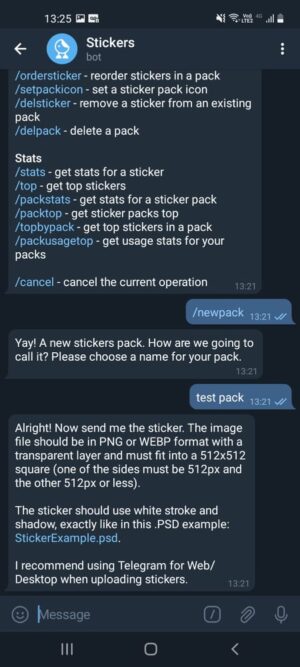
Right away, it will show you all the commands you can use. Including creating a new sticker pack, adding sticker, deleting existing packs and much more. Click on the “/newpack” option and it will direct you to create your first sticker pack. Start by naming it. With that done, it will ask you to send the first sticker, in addition to informing you that the mandatory file size is 512×512. That’s the size of most Telegram stickers.
Resizing stickers
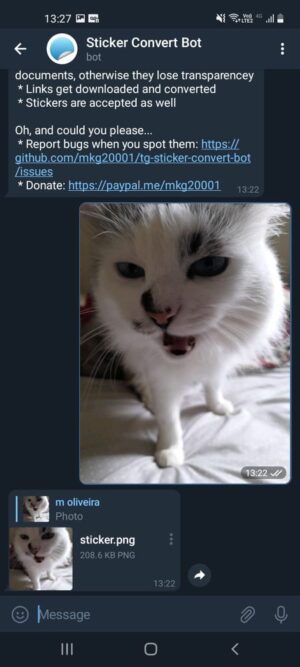
To do this without a lot of work, let’s go chat with @sticker_convert_bot. Just send the image you want to turn into a sticker to it.
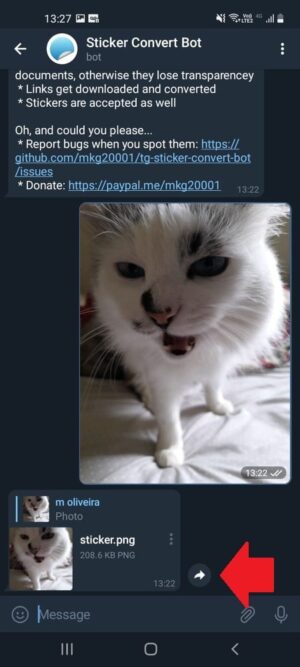
It will resize it and send you the finished image. Download it, then press your finger on the image and choose the “Forward” option. This is what we will need to create Telegram stickers.
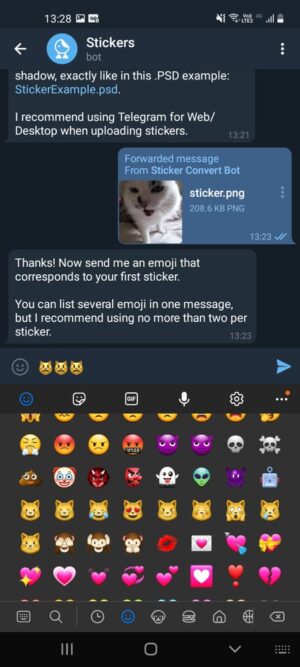
Now choose to forward the image to the @stickers chat tab. It’s important to do it this way, as this will send the photo as a file rather than an image, something important to the process.
The bot will check if everything is fine and will ask you to associate the sticker with an emoji. Choose the emojis you want and send them in the chat. Telegram stickers work like that.
There you go! The first of your Telegram stickers will be created and added to the package. You can repeat this procedure with as many images as you like.
Publishing stickers
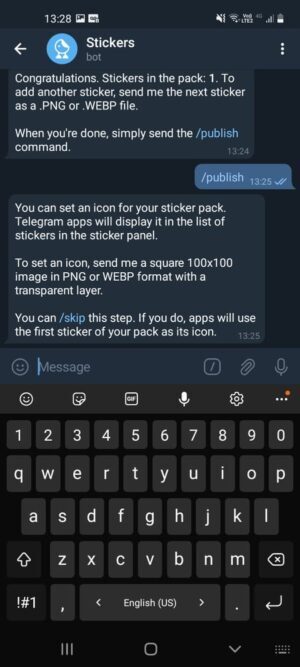
When finished, just type the “/Publish” command to publish the package.
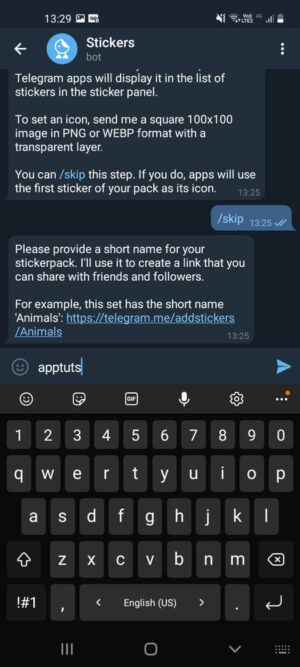
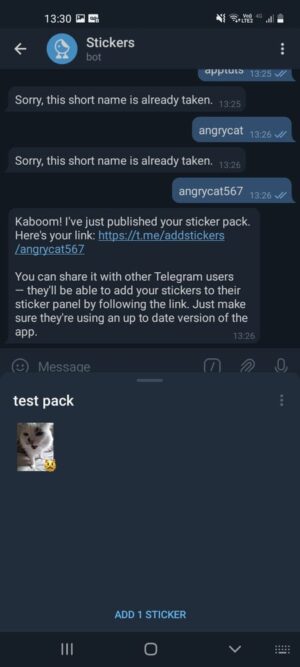
Now you can use the “/skip” command so you don’t have to create a special icon for the package. In this case, the first sticker in the pack will be used as your icon, which is much more practical. The next step is to give the package a shorter name, which will appear when you share it with others. This will end the process and publish your sticker pack.
You can click on the link the bot will send you to add the package or to send it to your friends. With that done, you can just freely use the Telegram stickers from the package you created.
To add new stickers to the same package, the process is identical. The only difference is that instead of selecting the command “/newpack”, you must choose “/addsticker. Otherwise, just keep using the bots and they will help you with everything. The process will only take long if you have a lot of stickers to be added. Pretty simple, isn’t it? Now just start creating Telegram stickers of your favorite things!
Did you learn how to create Telegram stickers?
It’s great being able to customize our user experience. Was this tutorial good enough for you to learn the ropes of creating some basic Telgram stickers? Comment down below, let us know!
