This is a feature that saves the current state of your PC that you are able to use as a sort of time machine to go back to that specific moment. If you want to learn how to use it, just keep reading our guide! Tip: If you use windows, check out the best PC software to make your life easier and the best multiplayer games on PC!
How to use the restore your Windows 10 to an older point
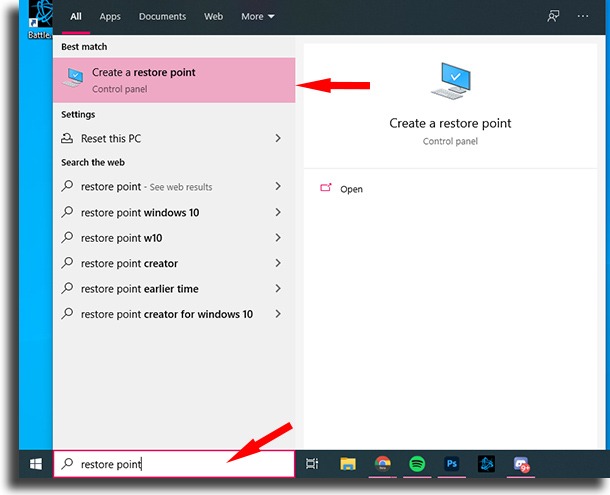
1 – Open the Start menu;
2 – Type in restore point (you don’t need to click anywhere to start typing) and then click the Create restore point option;
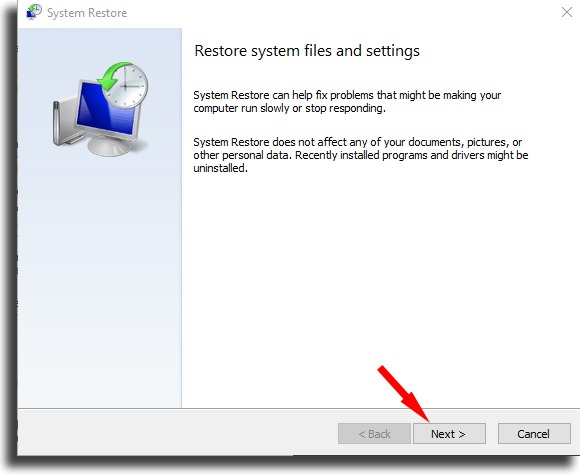
3 – Click System Restore…;
4 – Click Next in the window that will open;
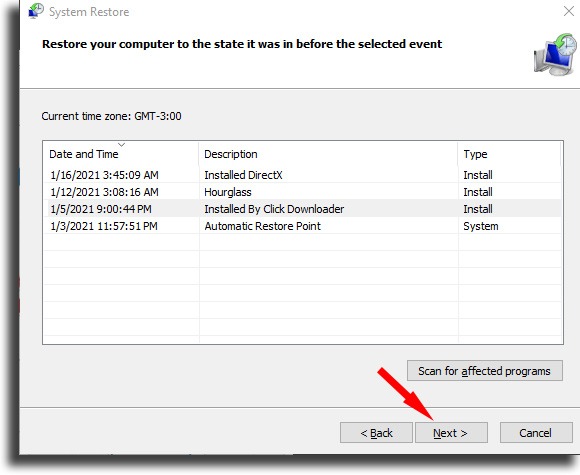
5 – A list with all the System Restore points on Windows 10 will show up here. If you don’t find the one you wanted, check the Show more restore points box;
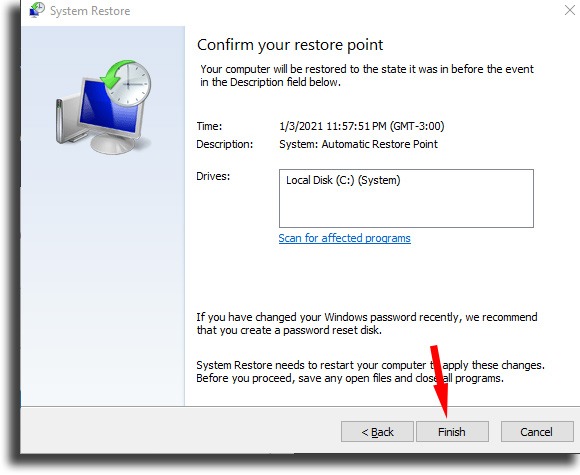
6 – Windows will show you which software you will need to reinstall after the restore is done by pressing the Scan for affected programs button. After you select the right point, tap Next; 7 – Confirm the restoration by pressing the Finish button. From here on out, Windows 10 will start to restore the system to the selected point and it will reboot when it’s done. Make sure your files are safe, since you can’t turn back now!
Did you manage to bring back your PC to an older point?
Doing the System Restore on Windows 10 is a great way to preserve the files on your computer when you’re facing an issue. You need to always create the points beforehand, however. If you don’t have one, check out the best free data recovery software!