To learn all about it, just check out the tutorial down below. Tip: Check out the best free PDF readers and the best PDF audio readers.
Creating PDF from images
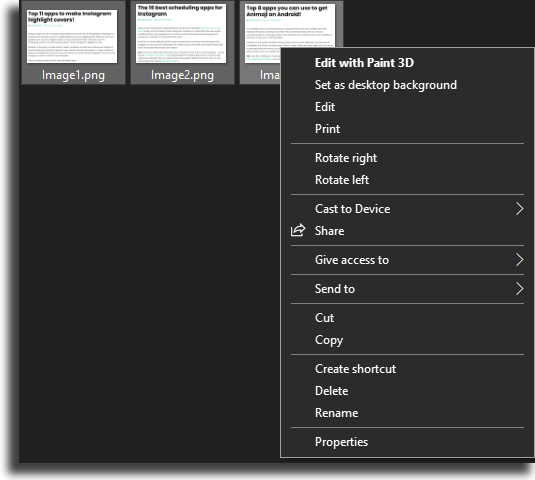
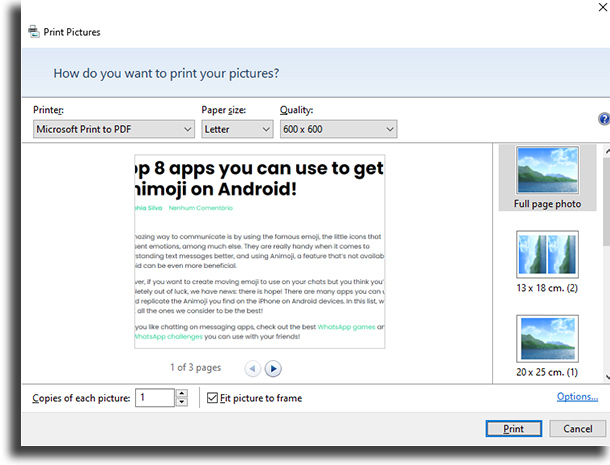
As we mentioned above, this process can be done natively on Windows 10, but if you use an older version of the operating system, you can still do it by installing an external software (or by many web converters). The one we recommend the most is PDF Creator, which you can download by following this link and works almost the same as in our tutorial. First off, go to the folder that has the images you want to convert into PDF on Windows. It can be a single image or several that you want to include into a single PDF file. Select the images you are going to use and right-click on them. Next up, you have to click on “Print” to proceed. You’ll then be taken to a window with a lot of options in which you can choose the proper printing method. On the “Printer” menu, select “Microsoft Print to PDF”, Windows’ own feature to convert images into PDF.
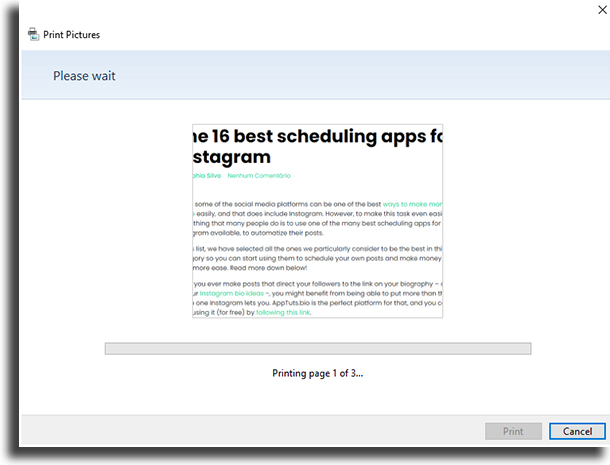
Select this option and feel free to change any other printing options, such as size and resolution, if you want. After everything is done and set up, just click on the “Print” button, type in the name of the final document, and wait until it’s done!
After just go to the “Documents” folder, or where you selected for the PDF to be saved, and you will find your new PDF that you can easily read anywhere! You can follow these steps any time you want and for most of the image formats, which makes the lives of anyone who scans a lot of documents easier.
Did you manage to convert images into PDF on Windows following these steps?
Let us know in the comments if we helped you out in this endeavor, and don’t forget to also check out the best Windows 10 wallpapers, learn what to do if your laptop won’t turn on, and find out which ones are the best drawing software for PC!


