This Australian platform is one of the most used to create posts for people’s social networks for free.
Even if you’re not a designer or digital marketing expert, with Canva and a few simple techniques you’ll be able to rock your art. Thus, your content for Instagram, YouTube, LinkedIn, and others will be able to reflect the characteristics of your brand and draw much more attention from customers. A good sale depends on a set of resources, ranging from content planning, and a good understanding of your target audience, to the dissemination itself. In publicity, a clear and objective message combined with an image that calls attention to its beauty and professional appearance is fundamental. This is where knowledge of tools like Canva comes in, where you can easily create beautiful posts. After all, good design reinforces the message you want to convey, and investing in this knowledge can bring incredible gains to your business. Even more so when we talk about a platform that has a lot of amazing features for free. We’re bringing you a list of simple design tricks like borders, adding shadows, editing text, and adding videos and music. So, let’s go to 10 easy design tips with Canva?
Why choose Canva?
Canva lets you create your artwork based on a multitude of templates and sizes and even custom formats. All this in a simple and uncomplicated way. And, most importantly, with many free resources of images, videos, and sounds. The tool also offers the possibility for you to upload your own videos, audios, fonts, elements, and much more. And you still have the option to schedule your posts on social networks directly through the tool. Not to mention the integration with several other features and applications that many experienced designers use in their routine.
Canva plans
Of course, many tools on the platform are free to use from paid plans. However, in this article, we will offer you options considering using Canva for free. However, it is worth knowing that Canva has three plan options:
Free: where you have access to over 250k free templates and 100+ types of design templates, with up to 5GB of cloud storage Pro: Unlimited access to high-quality content and tools, 250 GB of cloud storage, and the ability to schedule posts on up to 8 social networks. All this is to be divided into teams of up to 5 people. Enterprise: For teams of 25+ people, with all the features of Pro but with unlimited storage, integrated workflows, enterprise support, and more.
That said, let’s get to the design tips with Canva.
Getting to know Canva
Visual Standard
Before you start creating your arts, there is a very interesting possibility for you to create a pattern and speed up your creation process. One of the most important issues when we talk about brand design is visual identity. The visual identity is a set of graphic elements that demonstrate to your audience the entire personality of the brand. But don’t worry, it doesn’t have to be that hard, much less does it need to be perfect. If you choose to build a simple visual pattern, there are a few easy tricks to use in Canva. The visual identity is basically composed of a set of:
Colors Sources Elements Logo
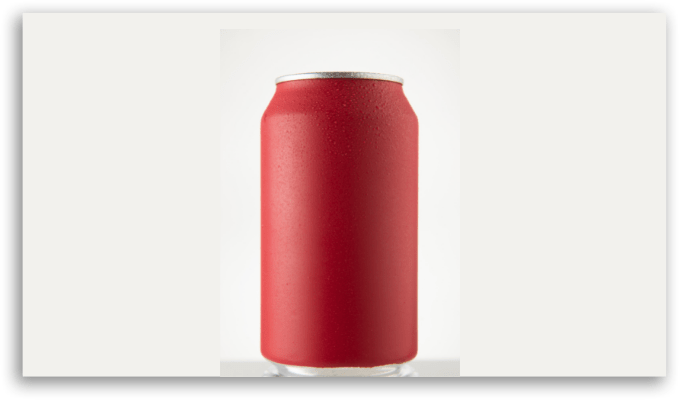
These elements brought together harmoniously will create a pattern in your communication with your audience. To better understand this idea, imagine that you are looking at this image below.
I can assure you that the moment you saw the can, even though it didn’t have any brand, you associated it with Coca-Cola, right? This is more or less what a good visual identity does for your business. Even without the brand, colors, letters, and elements remind us of companies and their products.
Creating your Brand Kit
Once you’ve defined your identity, you can build your Brand Kit in Canva, making your future creations easier. To do so, enter the platform – if you don’t have an account, access this link – and on the home panel, proceed with the steps below:
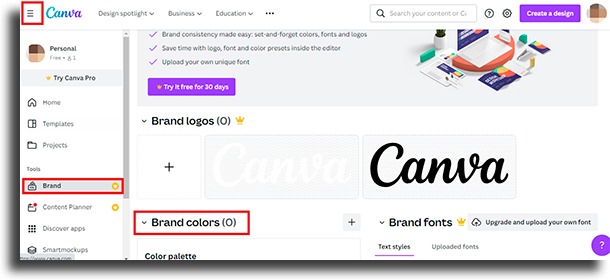
Click on the three dots in the upper left corner of the screen to open the Canva menu Look for Brand Kit There you can, in the free canvas, insert up to 3 colors from your color palette, that is, from the colors of your brand
NOTE: If your plan is Canva Pro, it will be possible to add more than 3 colors to your palette, insert and upload brand fonts and even insert your logo in your brand kit. If you still don’t have a color palette and don’t know how to create yours, in this article you will find a lot of information and the best sites to create your color palette. Another very important piece of information is the standardization of fonts that you will use in brand communication. In Canva you have access to many free fonts. It is interesting to choose at least 2 different font types. Use one for titles and important headlines and another that matches the first one and for inserting normal body text. Remember to pay attention to the readability of the fonts, it’s no use being pretty if people can’t read what’s written in them. This is another one of the super design tips to use with Canva. With your default colors and fonts set, it’s time to start creating your designs.
Template options
From Canva’s Home menu, you’ll have access to a variety of template templates and design styles. Select the one that best suits your needs, there are options to posts on social networks, videos, presentations, curriculum, business cards, and much more. Choose yours to start a new design.
Post dimensions
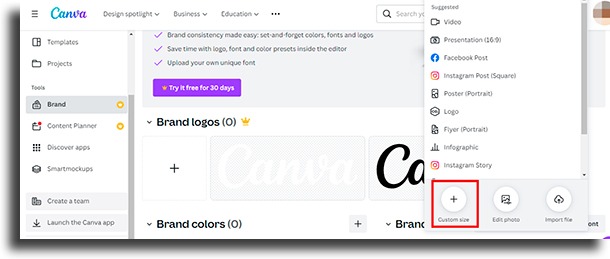
When we talk about social networks, we need to be aware of the post formats of each one of them, as the dimensions are usually different. We are so used to the Instagram square pattern (1080 x 1080) and the Reels and TikTok default (1080 x 1920) that we often miss the opportunity to show a professional image throght the arts, reusing without resizing. So stay tuned for sizes, and if you have questions, access our Complete Guide – Image Size for Social Media (2022). You can also set a custom size for your posts in Canva. Just select “Create a design” in the top right corner of the Canva home screen. In the menu that will open, click on the “+” sign for “Custom Size”. Enter the desired size (in pixels, millimeters, centimeters) and create your design.
An awesome tip for using custom size now that Instagram has changed the dimensions of the feed is to use the dimension 1080 x 1350 pixels. This way, you will have a design with the maximum vertical size that Instagram accepts in the feed. This can bring more attention to your content, as your image will take up more space in users’ feeds. Despite this, pay attention to the margins of your content – we’ll talk about this later – so that all the main elements can be seen by everyone, regardless of whether the app is up to date or not.
Design Tips
The basic pillars of Design are four: contrast, alignment, proximity, and repetition. Of course, we won’t be talking about them in-depth, but two of them are essential to help you make your arts more professional.
1. Margins and Contrast
Respecting margins and contrasts is very important when creating your posts. Visually speaking, creations that respect the limits and that have good contrasts of elements and fonts, already come out ahead.
Margins
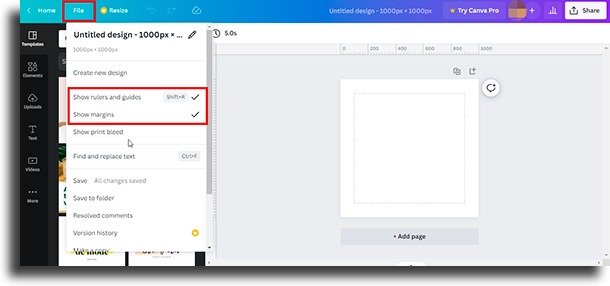
To add margins and guides to your design, click “File” in the top left menu of the page, then select “Show Rulers and Guides” and “Show Margins”.
This way you will have a clear idea of where the edges of your design are. Keeping the main elements within the margins will surely demonstrate greater professionalism. The cleanest look is indisputable, that is, with just one simple step you ensure that the initial look positively impacts your customers. It is worth remembering that some decorative elements can indeed go beyond these lines, but only to complement the art.
Contrast
Another very important point is the contrast of elements and especially fonts in a design. The function of this fundamental element is to attract and keep the attention of those who see the art. So if two items aren’t exactly the same, it’s best to differentiate them completely. And how to do it? Through the use of the color wheel, but to put it simply: a light background asks for a dark font, a dark background, a light font. However, remember that these colors should stand out to make it easier for people to read.
2. Shadows and contours
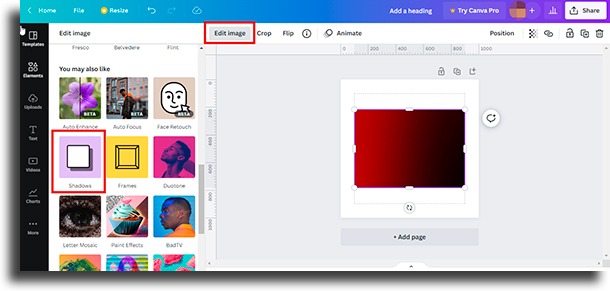
Once I figured out how to insert shadows on objects and texts, my art really changed. People began to notice and comment on how different my work was and I had no idea that these details could be so important. With Canva’s free plan, you can insert shadows and outlines into photos and objects, adding depth and a more realistic feel to your art. When you have an element or photo selected, you can add shadows to it, using Canva’s own tool. Select the element, click “Edit Image” and then scroll until you find “Shadows”.
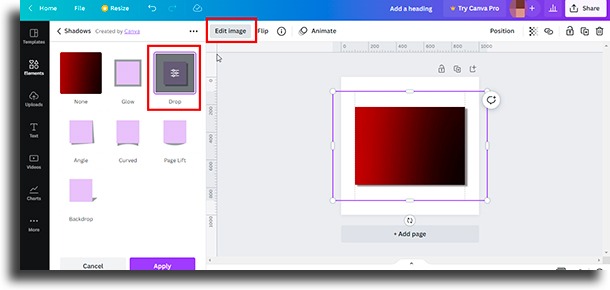
Select the type of shadow you prefer and click on the three lines that appear in the chosen style to edit it. It is possible to adjust the distance of the shadow to the object, angle, transparency, blur, and even the color of the shadow.
Now, if you want to insert a shadow on a rectangle or circle, for example, this rule above does not apply. However, you can search “Elements” in the left menu for “Shadow” and find the one that best fits your design. TIP: Canva free is not yet able to remove background from photos and images, but you can use other resources to do so and then upload the image and use it. See the Best apps to remove background from images
3. Blurring images with Canva
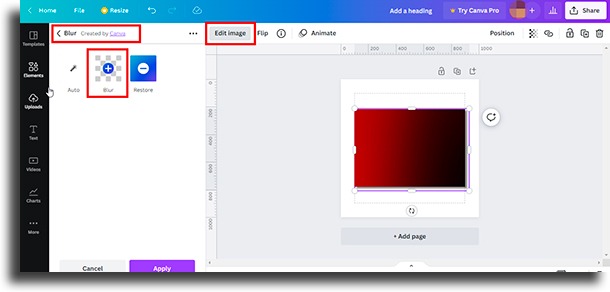
Now one of the amazing design tips possible with the free version of Canva is image blurring. With the image selected, click on “Edit Image” and look for “Blur”. Now select the tool and adjust the blur on the image as you wish. If you don’t like the result or have passed the brush in the wrong place, just restore and start again.
4. Gradients, textures, and transparencies
A great idea to easily transform the look of your designs with Canva is to insert a gradient or texture as the background of the image. As well as inserting transparencies throughout the design. There are several options within Canva for you to make your design more attractive. You can search by:
Gradient Texture Background Paper Blur
5. Text effects (shadow, curve)
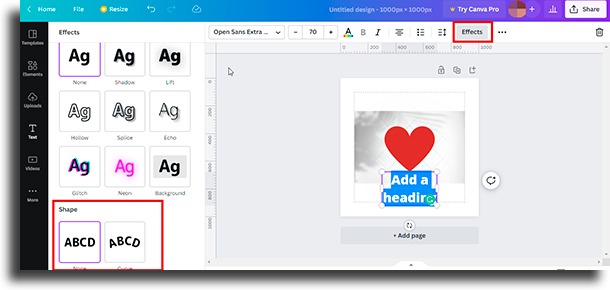
Adding effects to your text is another one of the easy design tips with Canva. To access the resources, select your text and then click on “Effects” on the top bar. A menu with several options will open on the left. See that there are several types of possibilities to style your text. You can insert shadows, misalign text, or make it neon. Scrolling further down you will even see that you can insert a curve effect in your text. See in the example below that we made a curve in each text, using a positive curvature for the first word (62) and the same curve for the second word, but negative (-62), to make a curve effect in reverse.
Use and abuse these effects, circulate elements, use creativity and generate an impact on people. Another very interesting and widely used effect is the waterfall font effect, reducing the intensity of the writing. See below for the main idea of this effect. We used the Horizon font because it is straight and simple, and easy to read. But in addition, it has two options, one with the normal font and the other with just the outer line – an effect you find in text effects as well. See how it turned out.
TIP: We use alignment to set all the words at the same distance, and we also place the position of all of them behind the elements. Remember to select all texts before using this feature.
6. Charts
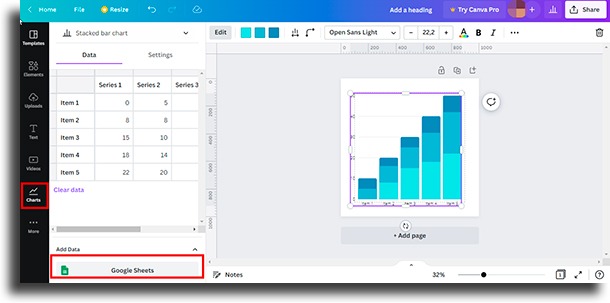
Charts validate your content and clearly demonstrate your message. Canva has several options for charts to be created, you only need to enter the data. In the menu on the left, select “More” and then “Charts”.
There are 15 different types of charts. Choose the one that best suits your project and click on it, then just enter the data. It is worth remembering that you can also enter data from an online Google Sheets spreadsheet.
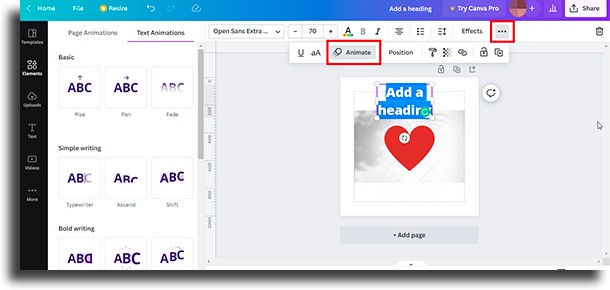
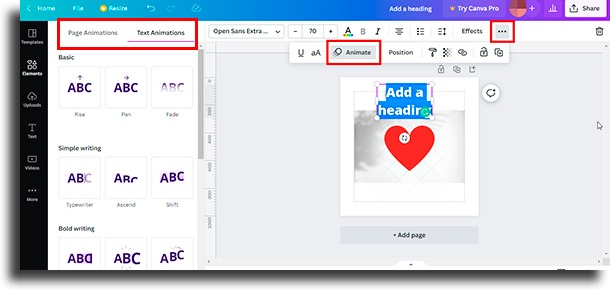
7. Animations
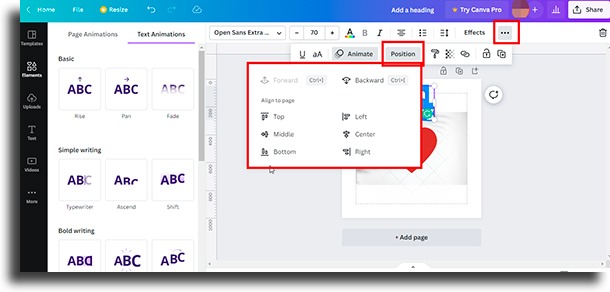
The seventh of the easy design tips with Canva we’ve brought to the list is worth testing and using in your posts. Platforms like Instagram, Linkedin, and Facebook are increasingly focused on delivering videos, through their algorithms, to users. After all, videos hold the public’s attention more and what social networks want most is users’ permanence in their applications, right? So how about inserting some animations in your texts or elements in a simple way? To animate a text, element, and even a page, select or insert a text box and select, in the top menu, a box written “Animate”. Click on the box and from the left menu choose the animation you prefer. Once you define an animation style, some options like animation speed and direction are offered for you to choose from, just like shadows. Adjust as you wish and repeat for all other texts or elements.
It is also possible to animate multiple items at the same time, so they will have the effect together. To start, press and hold “Shift” on your computer’s keyboard and, with the mouse, select all the elements to include them in the selection box. Now use the “Group” button or Ctrl+G. Once all the elements are grouped, repeat the animation process we taught above.
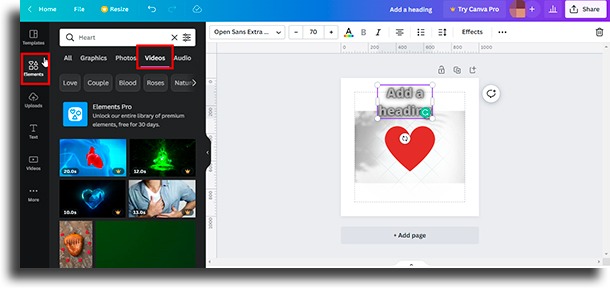
8. Inserting videos
Well, since we’re talking about engagement on networks, there’s nothing better than working your designs with videos. In Canva you can create Reel videos and video artwork, for example. You can search for videos in the “Elements” menu under the “Videos” tab.
Another possibility, as mentioned above, is to upload the videos that you have saved on your computer. To upload videos, go to the “Uploads” tab and click “Upload”. Find the file and upload it. Note that, in this same menu, you can also select “Record yourself” and record a video directly in Canva, using your device’s camera. Just grant the necessary permissions and start recording. Remember that you can create and edit amazing videos with Canva.
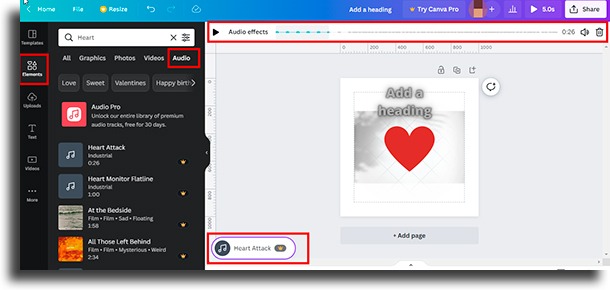
9. Inserting songs
Human beings are synesthetic, seeking sensations in sight, sound, touch, and taste. So why limit yourself to just the visuals when you can hit your customers’ sound memories? Just like videos, you can insert music into your artwork and get your message across even more strongly, and with the ninth of the ten design tips with Canva, we’re almost done with our list. The only issue is to pay attention to the use of the songs because of copyright. In this way, there are two safe paths. One of them is to use the audios that the platform itself makes available. Then access the “Elements” tab on the left menu and select “Audio”. Listen to the audio and click on a file to add it to your archive. Note that the audio will be in the left corner and below your design and that you can click on “Audio Effects” to include a gradual input or output.
If you choose to add your own audio, go to “Uploads” and “Upload”. Search for the audio in your library, select and wait to add it to the video. TIP: Audio in Canva is in mp3 format. So if your audio is in mp4, for example, you will need to convert the file. Another option is to search for audios in the YouTube audio library by downloading songs on your computer without fear of infringing the artists’ copyright and running the risk of having your video blocked on social networks. TIP: To access the library, sign in to YouTube using your account and go to YouTube Studio. Select audio library and you’re done. Remember: Do the simple well done!
10. Posting on social networks
Finally, it is worth mentioning that if you want more practicality, you can link your social networks with Canva and already post or schedule – in the case of Canva Pro – the posts directly there. You can choose from the following social networks: Instagram, TikTok, Facebook, Twitter, LinkedIn, Pinterest, and Tumblr.
Did you like the easy design tips with Canva?
So share with friends and rock your creations!